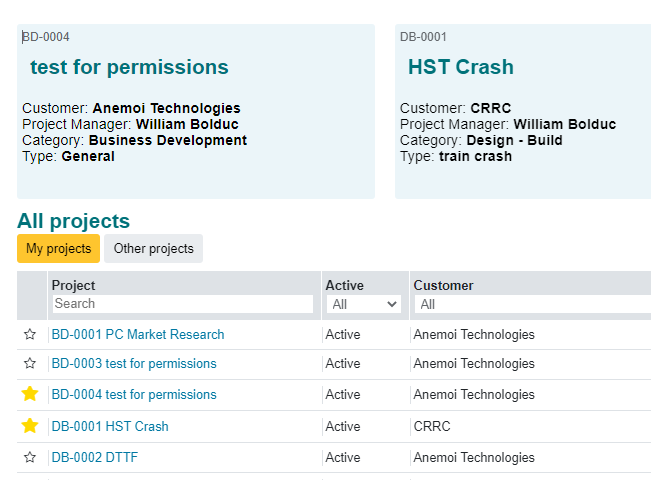
¶ View list of available projects
Click on the top right menu to display a list of all projects for the company

click on a star in the first column to add a project to “favorites”
¶ Add a new Project
In the top projects selection menu, all the currently available templates are displayed, and there is a facility to import a *.xml file, typically to make a copy of a MSP project.
Note that the User can create a new project from a previously generated template.
In case that the accounting system (for example) auto-creates is own project number, then the external reference captures that project number.
A new Project is added from the Top Menu.
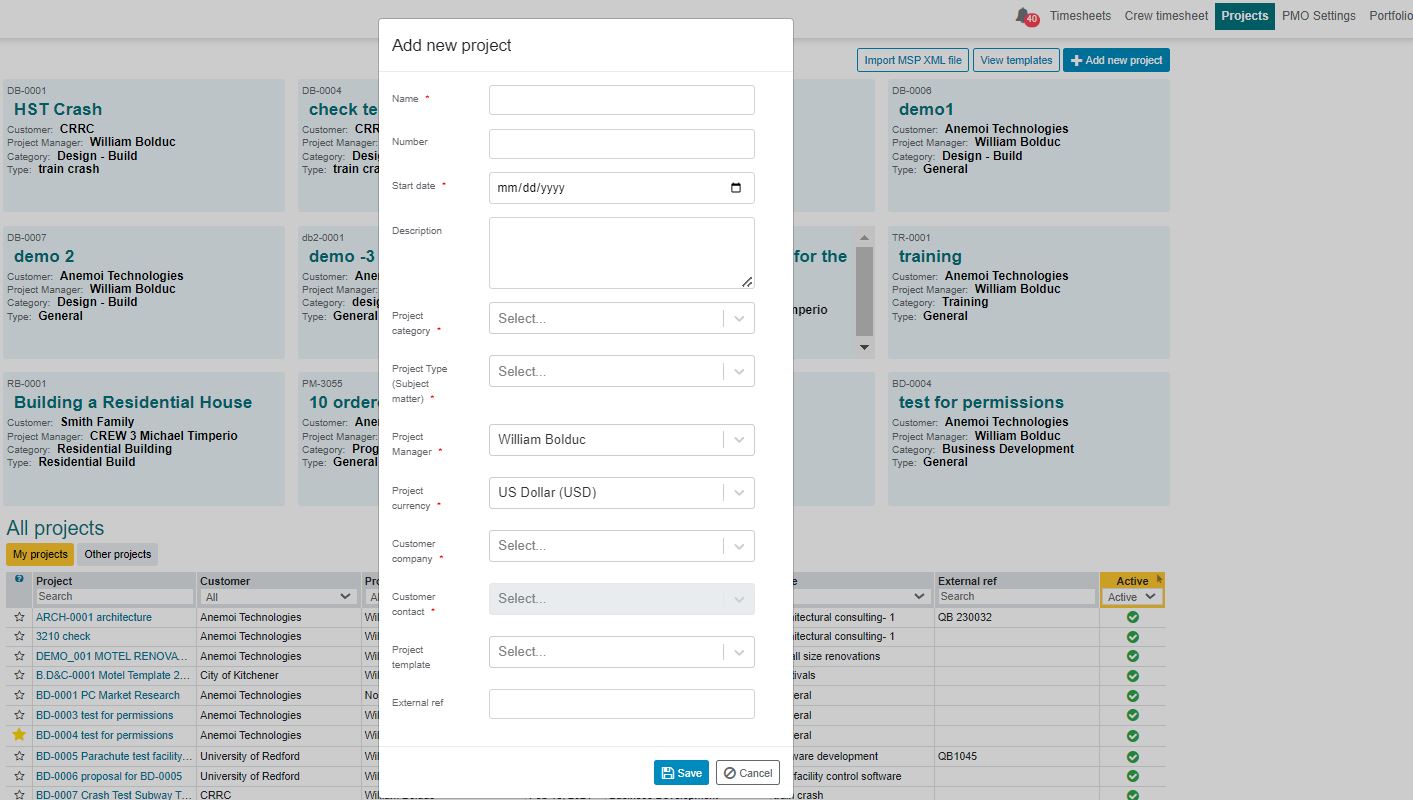
Typically, a project is started by the designated PMO (Project Manager Officer), who also selects the Project Manager.
On completing the process, the Project page is set up in the project’s menu with the information as input above, and a menu of tabs:

¶ Tab: Properties
"Properties” originates from the request for information shown in the Administration / PMO setting menu. Properties are specific for each Project Category.
The properties are shown in the project tab line, and can be edited there via the Edit button.
example :
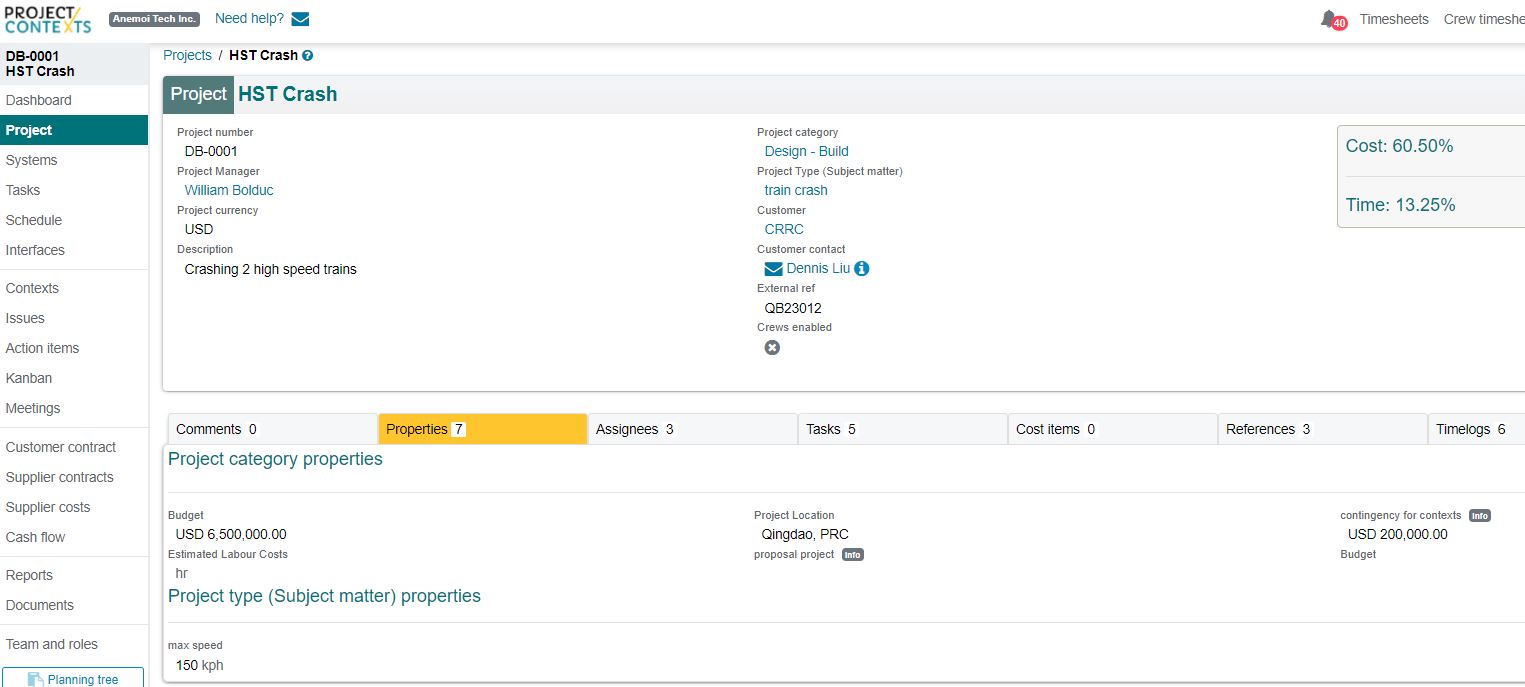
As a default, those properties are viewable by any team member that has access to the this part of ProjectContexts. However the permissions can be changed by the PMO if required.
Begore we contune
¶ Add an employee to a team
Navigate to the "Team and Roles" menu item, and add an employee as team member. you can also edit team permissions from there.
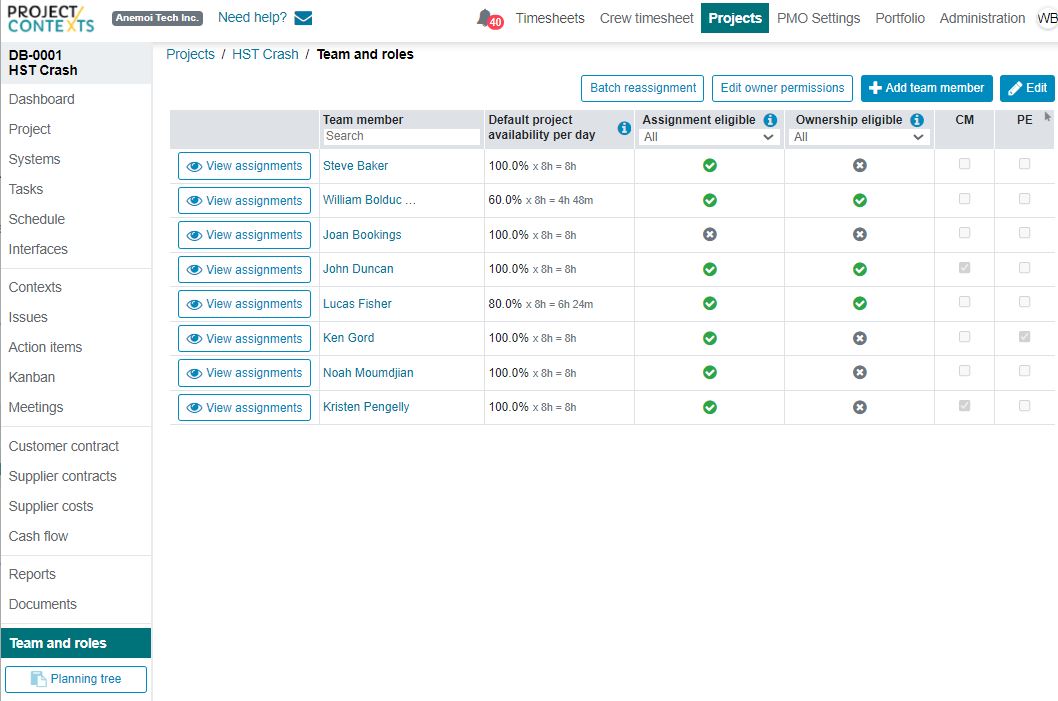
Note: Click “Edit Owner Permissions” to customize the default owner permissions to suit the PM's own management style.

The Project Manager had been added by the PMO, and by default is the first team member.
“CM” and “PE” had been defined in the PMO Settings / Roles and Permissions.

(Note thast the PA had been selected as “inactive”).
Click on “+ Add new member” to view a list of [ProjectContexts] licensed employees.

¶ Add a role to a team member

The edit button allows us to complete the checkboxes if any.

¶ Tab: Assignees
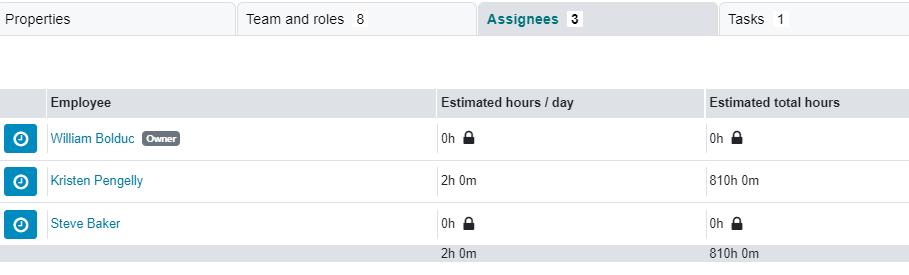
You can assign team members directly to projects and systems. However, since both the project and systems do not have a defined duration the only time that can be allocated is overhead time in the form of hours/day. The initial hour's estimate are shown in the tab, see below. Those are reused as an estimate of remaining hours (in the calculation of progress). The assignee team member, via the timesheet, either confirms or edits the current estimate, thereby locking the initial estimate. Until that fort timesheet is approved, the “initial” estimate is still open for editing. Note that the project line itself (in the schedule) behaves like a system. If you really want to assign a fixed number of hours to the project line itself, you first need to add a task in the project and make the appropriate to other tasks in systems.
¶ Add a new System
A new system (or sub-system) is started from the Systems Menu: (see below, top right button).

The system can only be initialized inside the systems menu, it is automatically viewable in the schedule as well (see below, “view in schedule” button).
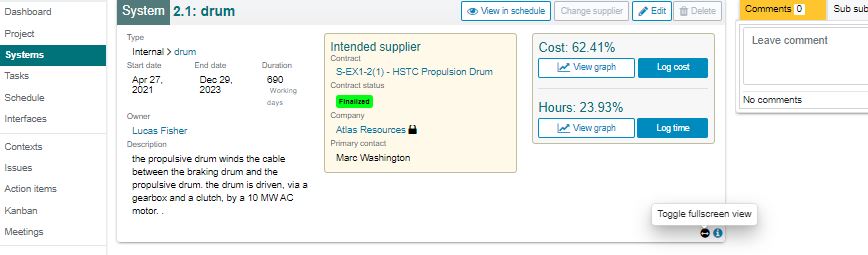

with the toggle full screen view:

Note that in the case above, the intended upplier has been contracted already, and no suppliers can be added. ( see disabled “Edit” button above)
¶ Tab Menu: Considered Suppliers for bidding
The tab menu behaves in a manner similar to that of the project, except that systems have 2 additional tabs: considered suppliers and interfaces.
Considered suppliers are those suppliers that may qualify to bid on a system.
Also refer to Contract Planning
¶ Intent to contract
Before a contract is awarded, there is a preliminary step to signal to stakeholders that there is an intent to do so.
The supplier can only be chosen from the list of considered suppliers.
In case of a “sole-source” contract, only one supplier would be in the list of considered suppliers: the process allows to formally send and track documents to that supplier before an actual contract is created.
step 1 after considered suppliers have been defined, press “intent to contract”
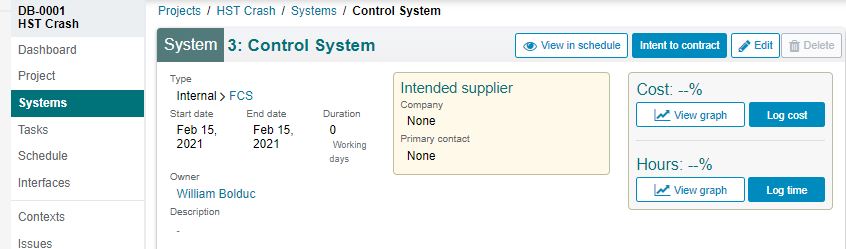
step 2: select and click on “confirm”
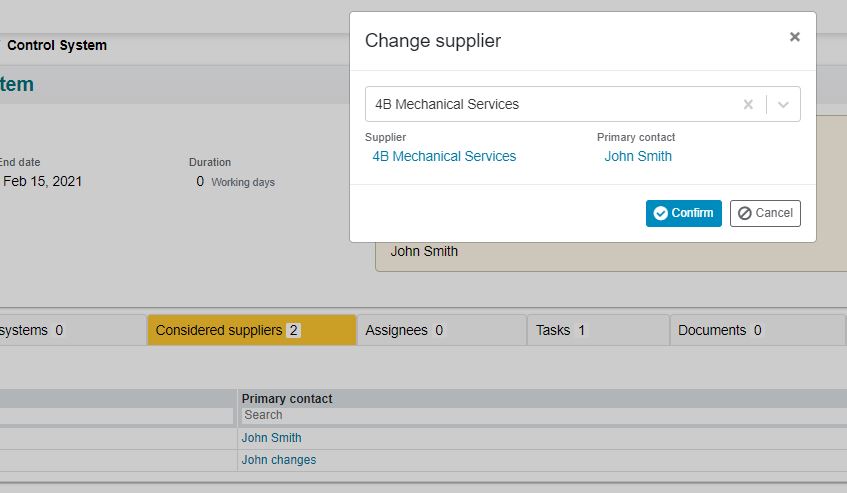
step 3: the intended supplier is defined
status is still shown as “no contract”, and the company name is still shown as “unlocked” until a contract is confirmed; until such timethe upplier can still be changed via the “change suplier” button.
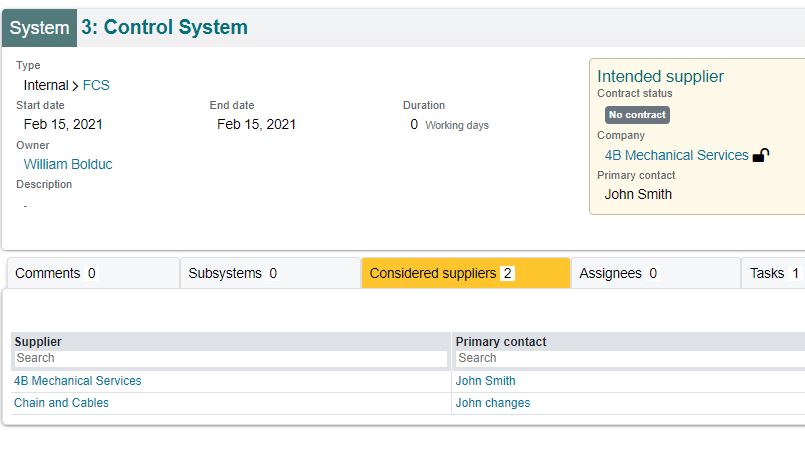
After you are sure that this is the supplier with which you want to enter into a contract, select “Supplier Contracts” in the main menu
¶ System assignees

Note that Lucas Fisher is marked as the Owner ( “System Owner”) and the hours are expressed as hours per day.
¶ Interfaces
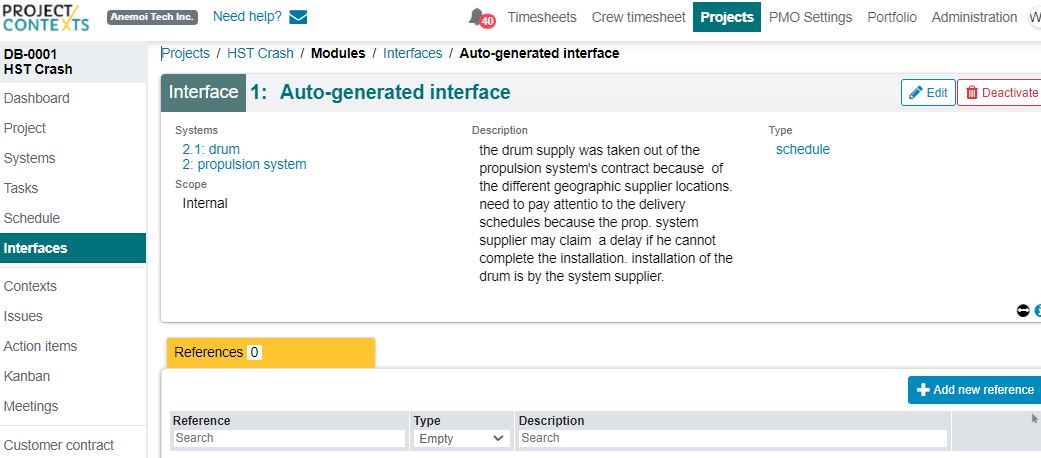
In ProjectContexts, interfaces are those between systems. Interfaces are used to remind the contracts department to add relevant information in supplier contracts.
Auto-generated interfaces are those between systems and secondary systems, i.e. between system 2 and sub ystem 2.1 and/or between system 2.1 and 2.2.1. Essentially these interfaces would be used if a system contract is decomposed into several subcontractors instead of awarding a sole contract for the whole (main) system.
The types of interfaces can be formalized in the PMO settings. An example is the interface between a drum contract and the contract for upplier of the concrete plinth that is the foundation for the drum: in whose contract is the supply anchor bolts? (interface type: “supply”). The drum installation can only start after plinth installation is completed. ( interface type: "schedule")
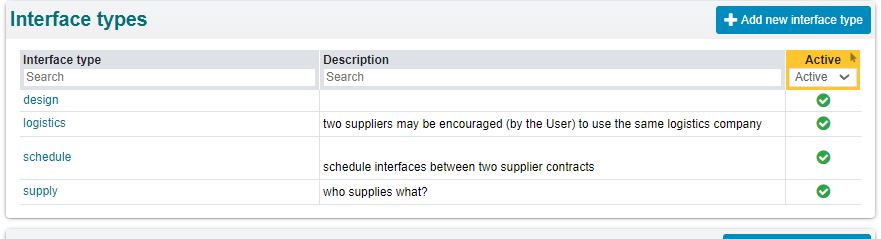
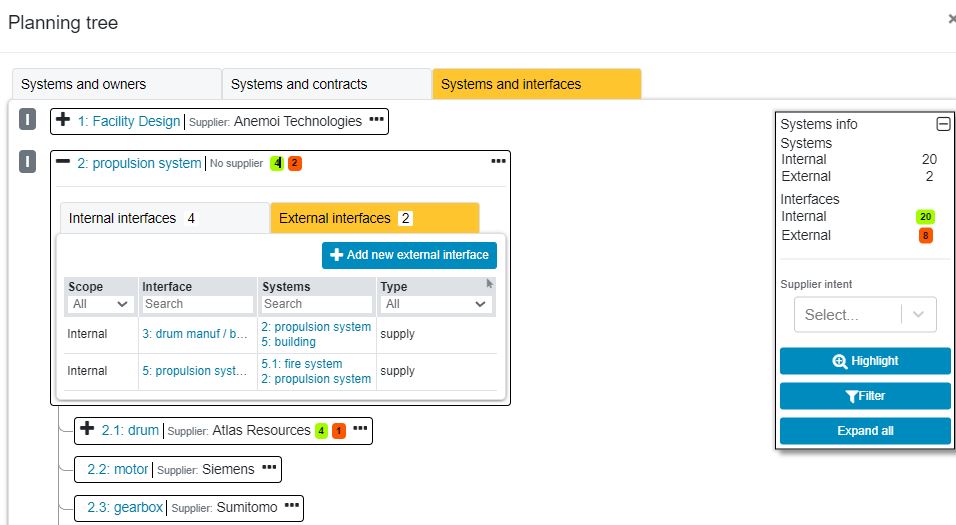
“scope” of the interface signifies whether the interfce is internal to the User's contract, or external to the Uer's contract. ( for example an electrical supplier may need a cable tray to go “through” a wall supplied by the Customer's building supplier.)
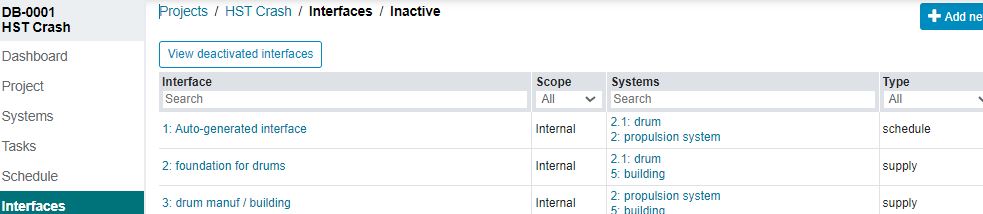
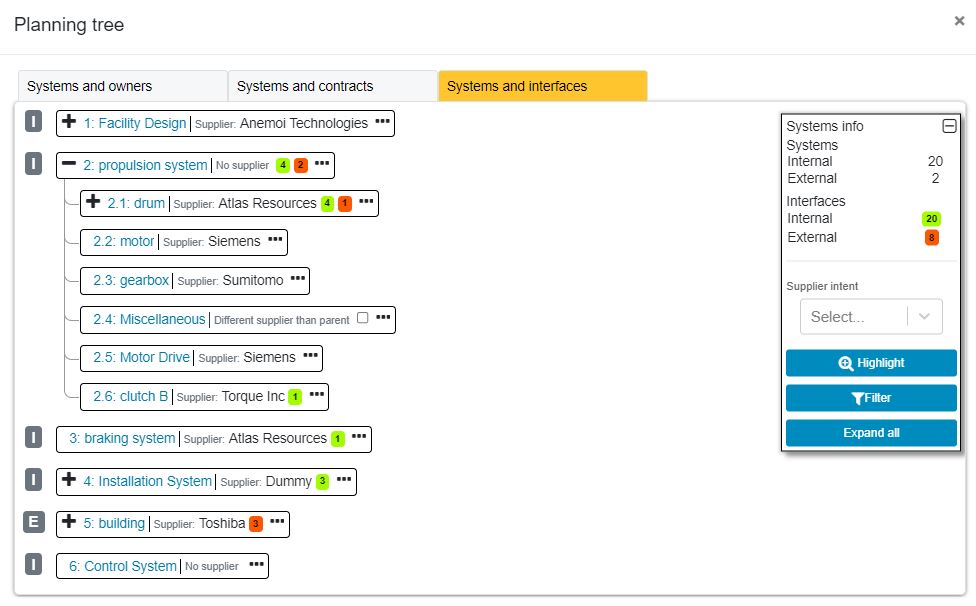
Finally, the planning tree keeps track of all the interfaces
¶ Add a new Task
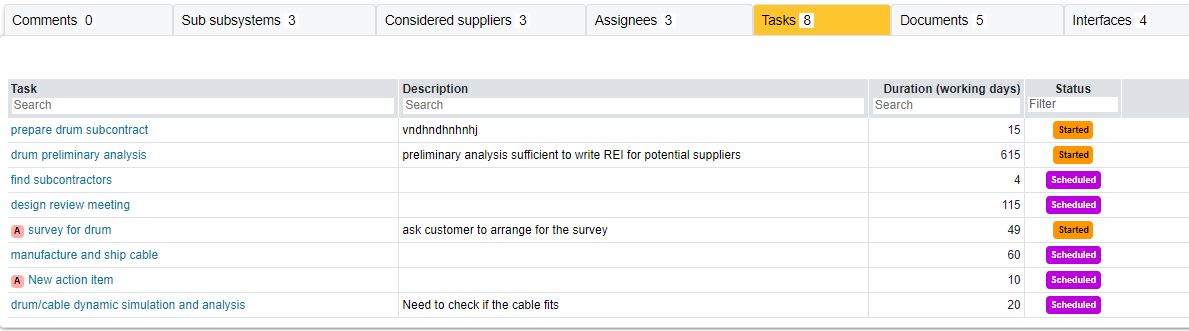
A task can be added inside the systems' module or inside the schedule. Tasks can also be tracked (not created) in a dedicated Tasks table (see Tasks menu).
¶ Add Task in the systems module
¶ Post a Task from the systems module to the schedule
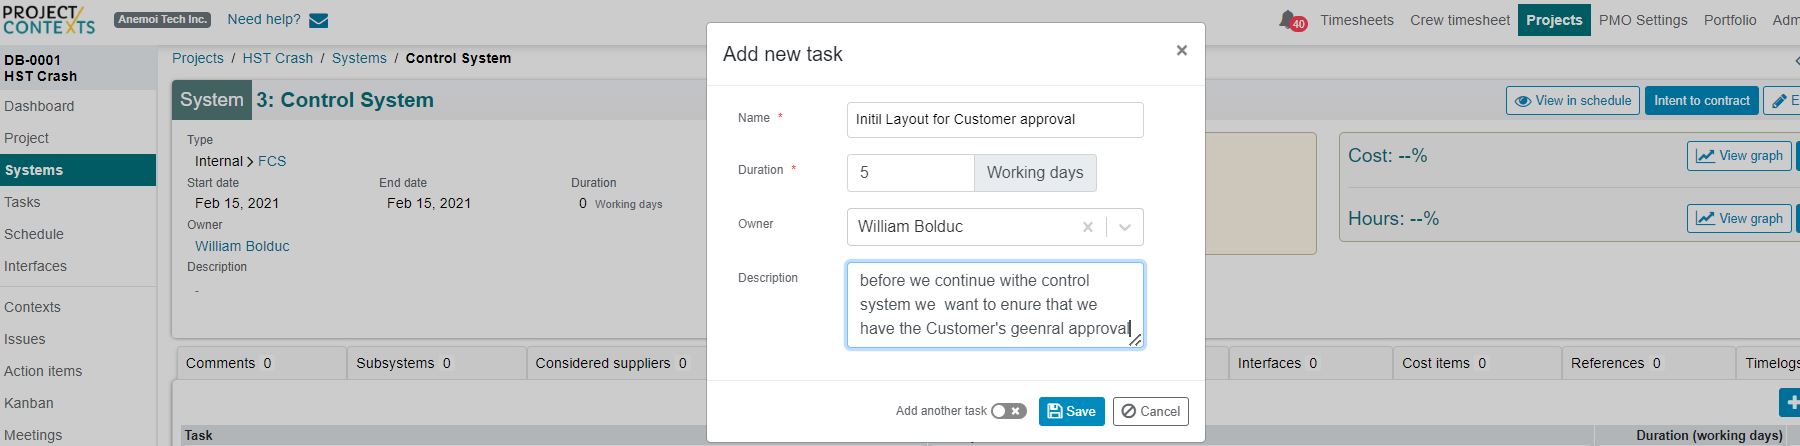
After the task is defined, the User has te option to post it on the schedule, dependent on ermissions. If permissions do not allow it then the button will be greyed out. ( In general the Owner or the PM has the permission). ( see the dynamic hierarchy page) The user can flip back and forth between a view in the systems page and in the schedue page.
Note: when a task is posted, it is posted automatically wih an early start = project start. Add a predecessor relationship to the task; alternatively add proper constraint. The constraint can be added from within the systems' task page before posting to the task to the schedule.
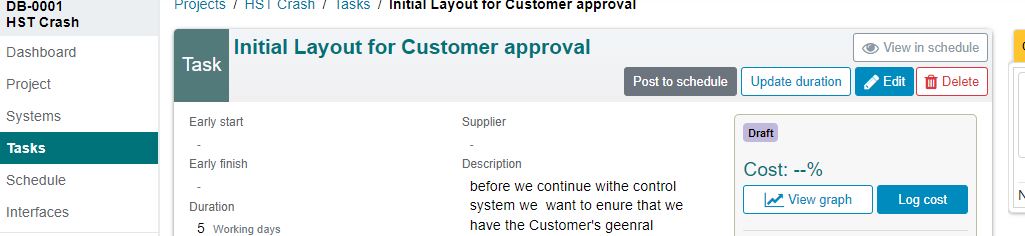
¶ Add a constraint to a task
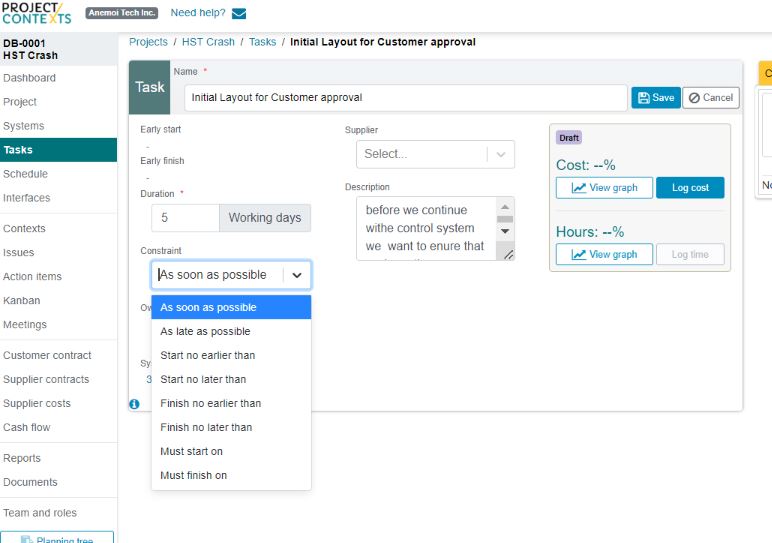
¶ Add a Task to a system directly inside the schedule
Click on the “+” beside the system name to add a task.

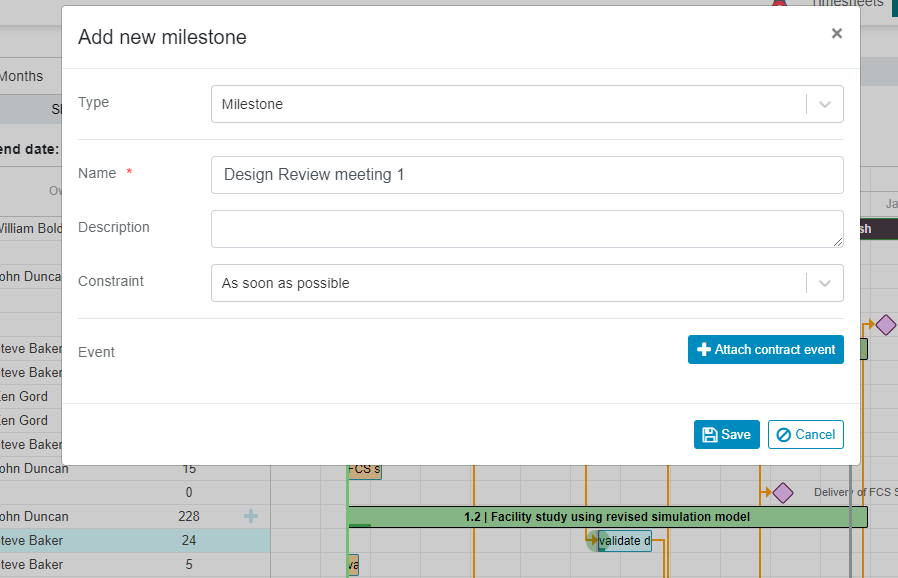
Adding a task from the schedule allows the option of selecting a milestone as a type of task. Milestones are not available in the systems module.
The default setting is “Task”
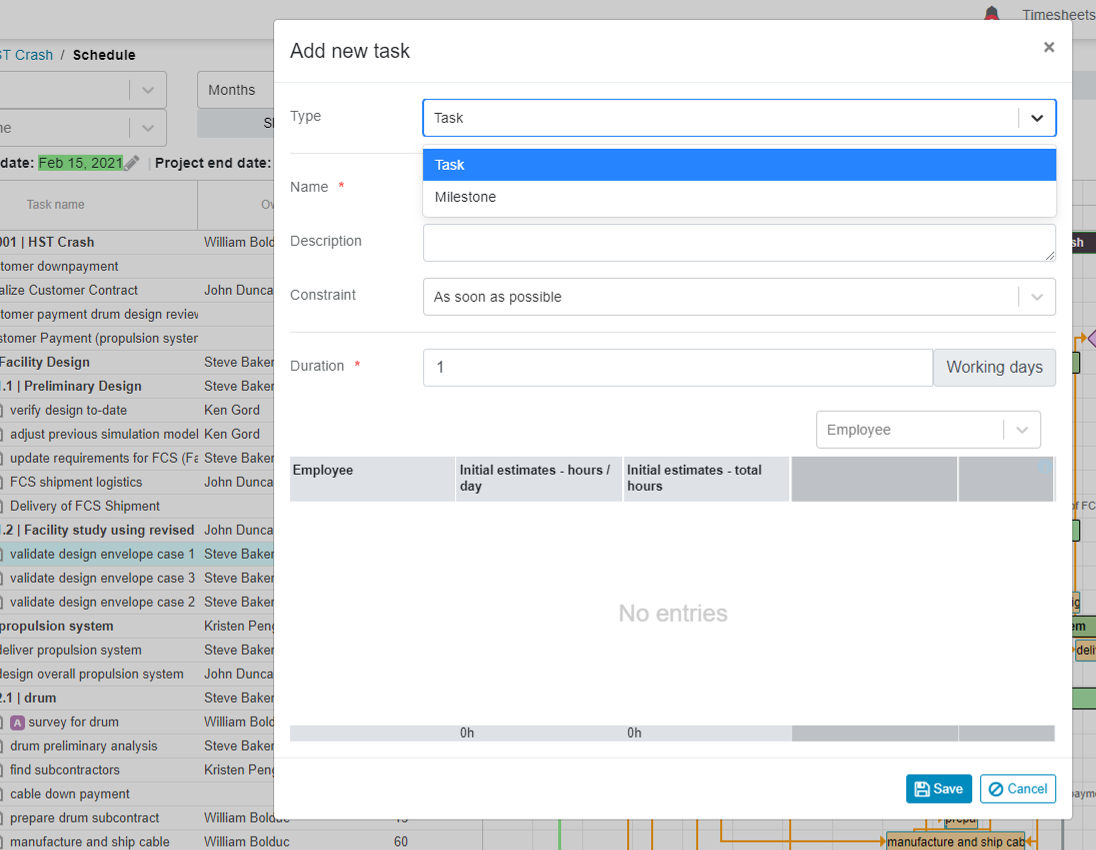
A milestone can be selected as well, in which case
the duration is set to 0
optionally the milestones can be made available to other OFF-Schedule elements. In the example's case it is made available ( as a populating in a dropdown box) in a contract:
¶ Add and edit assignees for a task
Select the assignees, and add time to each. By default, the first assignee becomes the Task Owner, however, the system owner can change the Owner.

¶ Define Team member availability
A default availability for all team members is defined at the cooporate level.
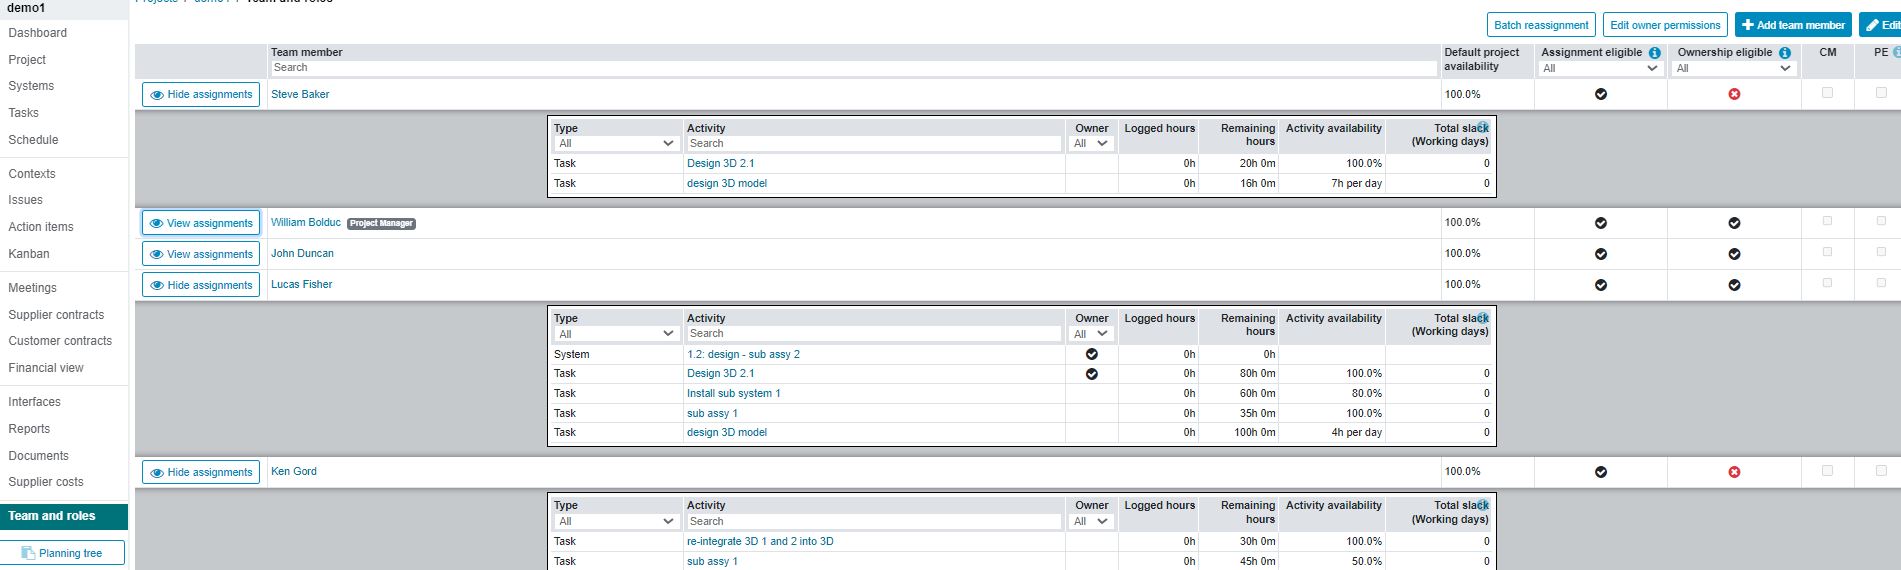
Note that a summary for all availabilities is available in the project's Teams and Roles menu item

¶ View Tasks Table
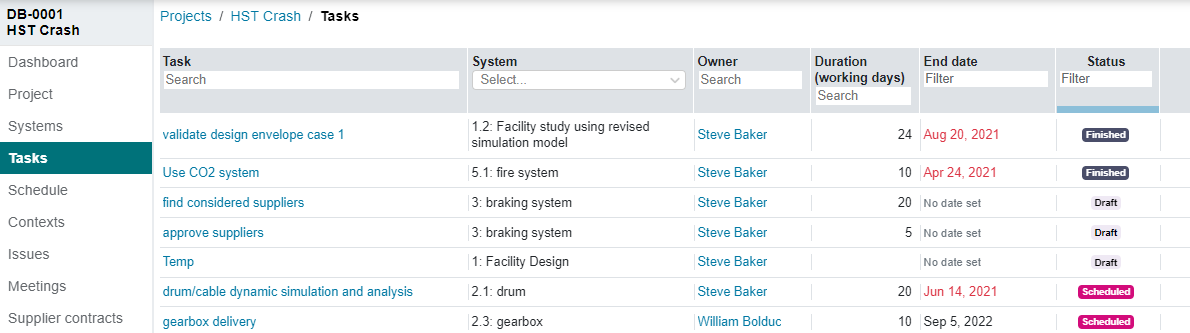
The table below is filtered for the status. (see blue line in the column header).